Xero has launched a new version of the GoCardless integration as of the 7th of April 2021.
If these guides do not reflect your experience please switch to the new support guide here
This article will cover two options that impact your customers' experience when setting up their Direct Debit prior to you being able to collect funds from them.
Editing the authorisation request email
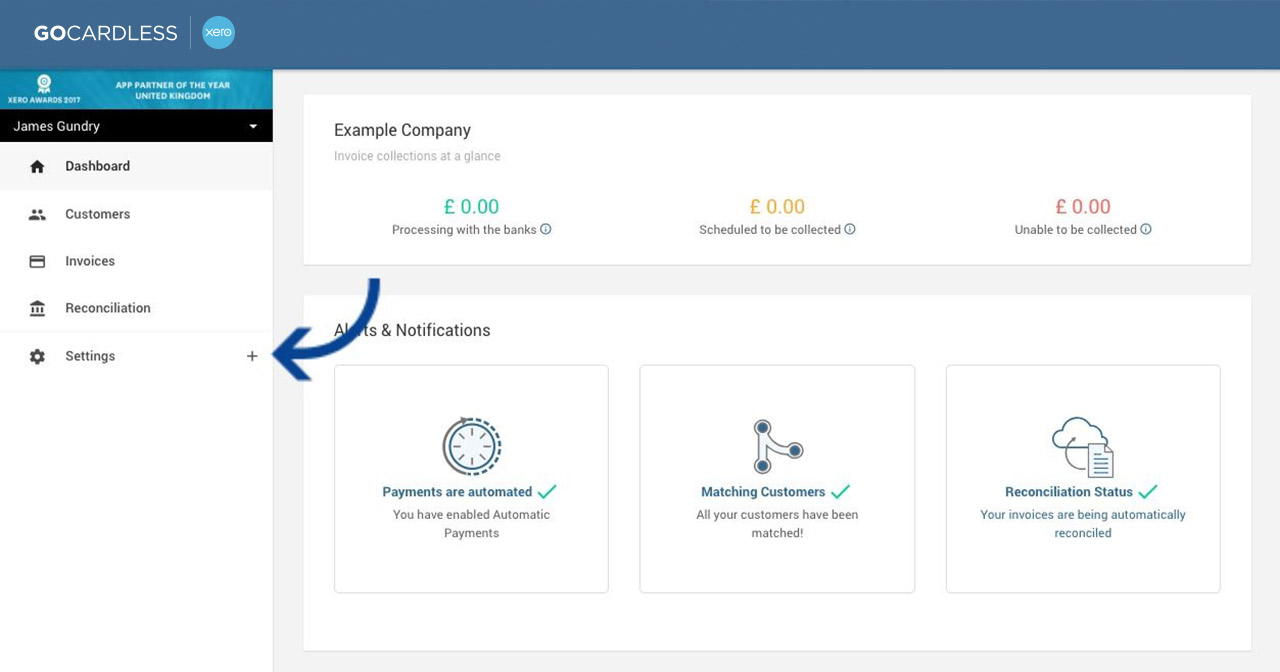
1. Open up the Settings section in your left menu bar by clicking the plus sign (+)
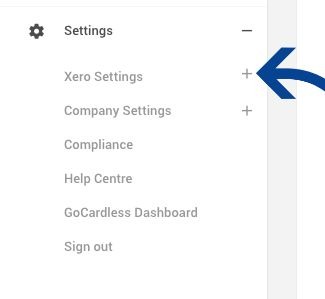
2. Open Xero Settings
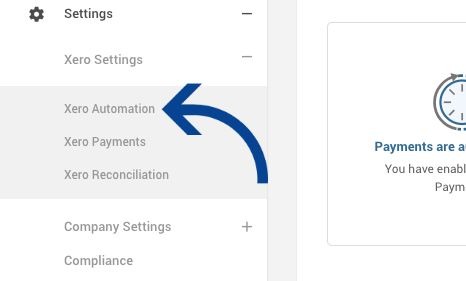
3. Select Xero Automation
You will now see the section where you can edit the email message your customers will receive when you send them a Direct Debit authorisation request.
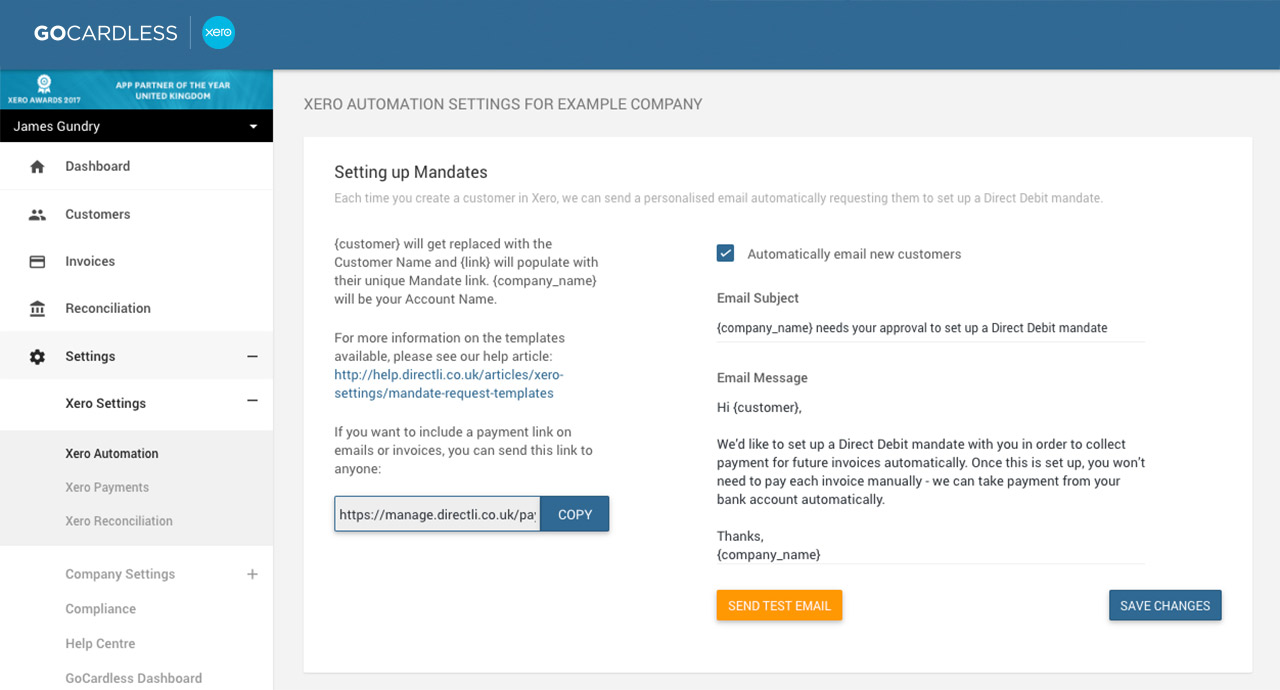
4. Edit the Email Subject and Email Message text as desired
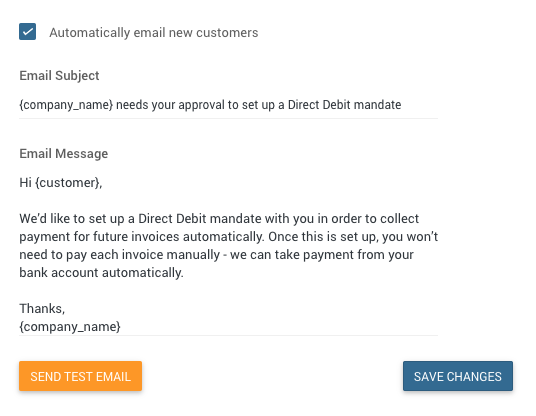
In the email template field, you can set personalised parameters to be replaced on each customers email with their personal information. Below is a list of parameters that can be used:
| Parameter | Description | Example |
| {company_name} | Your company name | Your Merchant Name Ltd |
| {customer} | This will be replaced with their FirstName LastName or their company name if their name is not set |
John Smith or Demo Company |
| {customer_first_name} | The customer's first name | John |
| {customer_last_name} | The customer's last name | Smith |
| {customer_company} | The customer's company name | Demo Company |
| {customer_full} | The customer's first name, last name and company name |
John Smith (Demo Company) |
| {customer_email} | The customer's email address | john@example.org |
... and hit Save Changes once done.
Adding a Pay Now button to invoices
Invoices sent from Xero often include a link to view and pay the invoice online. You can add this feature to invoices with GoCardless for Xero, so that customers can set up a mandate with you. They can choose to approve payments for each individual invoice, or enable future invoices to be paid automatically.
The Pay Invoice Online option is enabled on a per Branding Theme basis. When you enable the Pay Invoice Online option all invoices associated with this Branding Theme will have a Pay Now button.
To enable this feature...
1. Open up the Settings section in your left menu bar by clicking the plus sign (+)
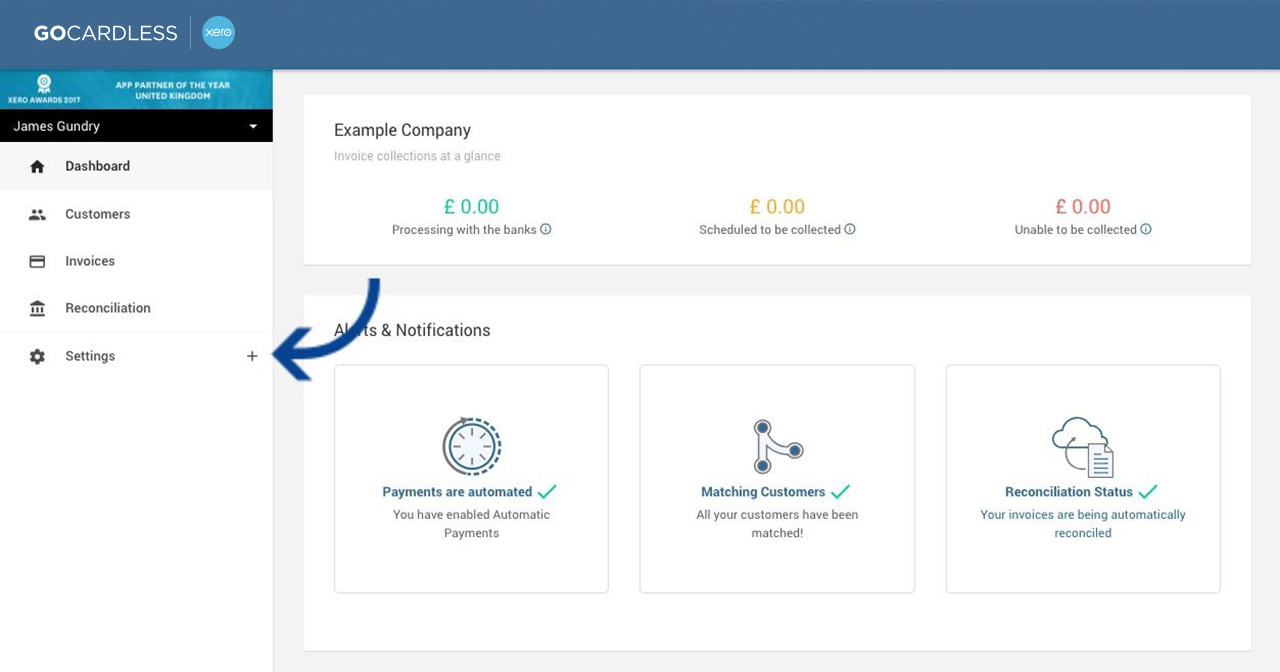
2. Open Xero Settings

3. Select Xero Payments
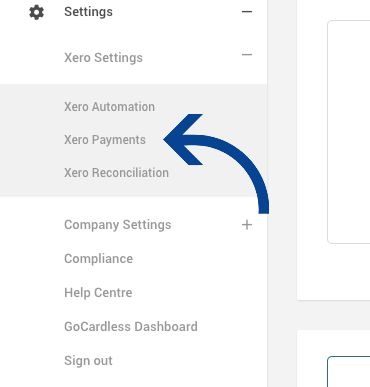
Please note: You will need to be logged into your Xero account for your Xero payment settings page to open.
4. Click the toggle to Pay Invoice Online for your chosen branding theme
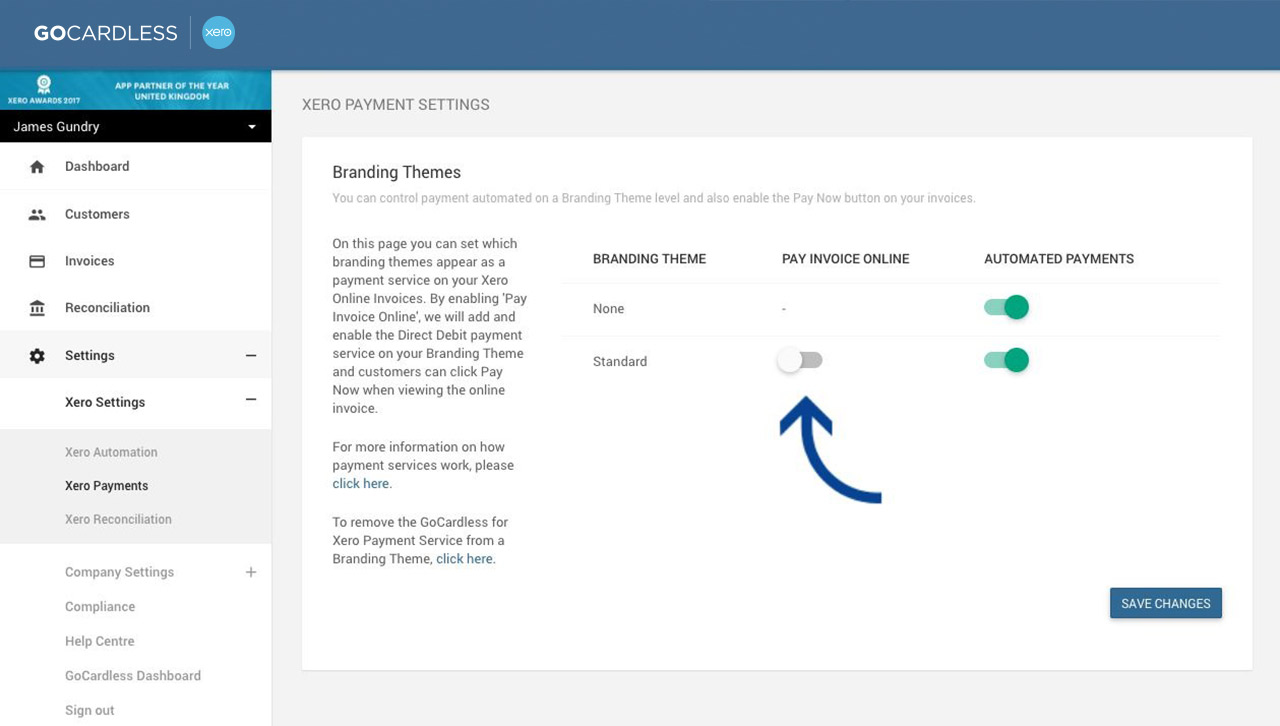
5. Once turned on, the toggle will turn green

6. Click Save Changes before exiting the page to update this setting

Here's an example of what a customer will see on their invoice once the Pay Now button option is enabled:
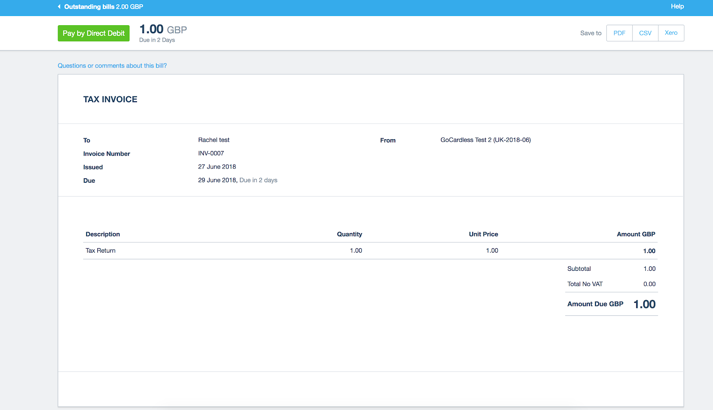
Notice the Pay by Direct Debit button in the top left.
Once clicked, the customer will be directed to complete their online Direct Debit authorisation form as usual.
Step 1:
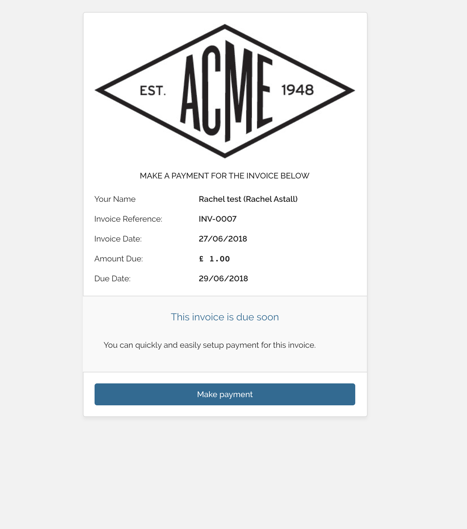
Step 2:
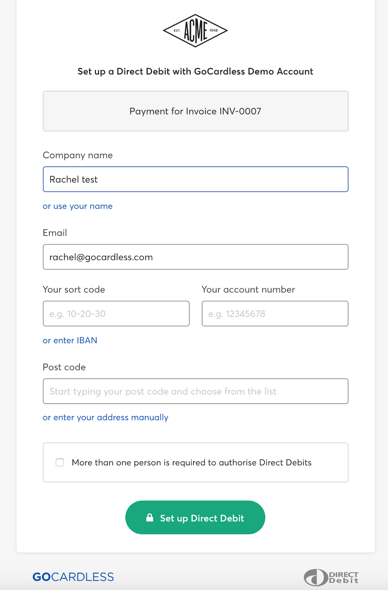
Step 3:
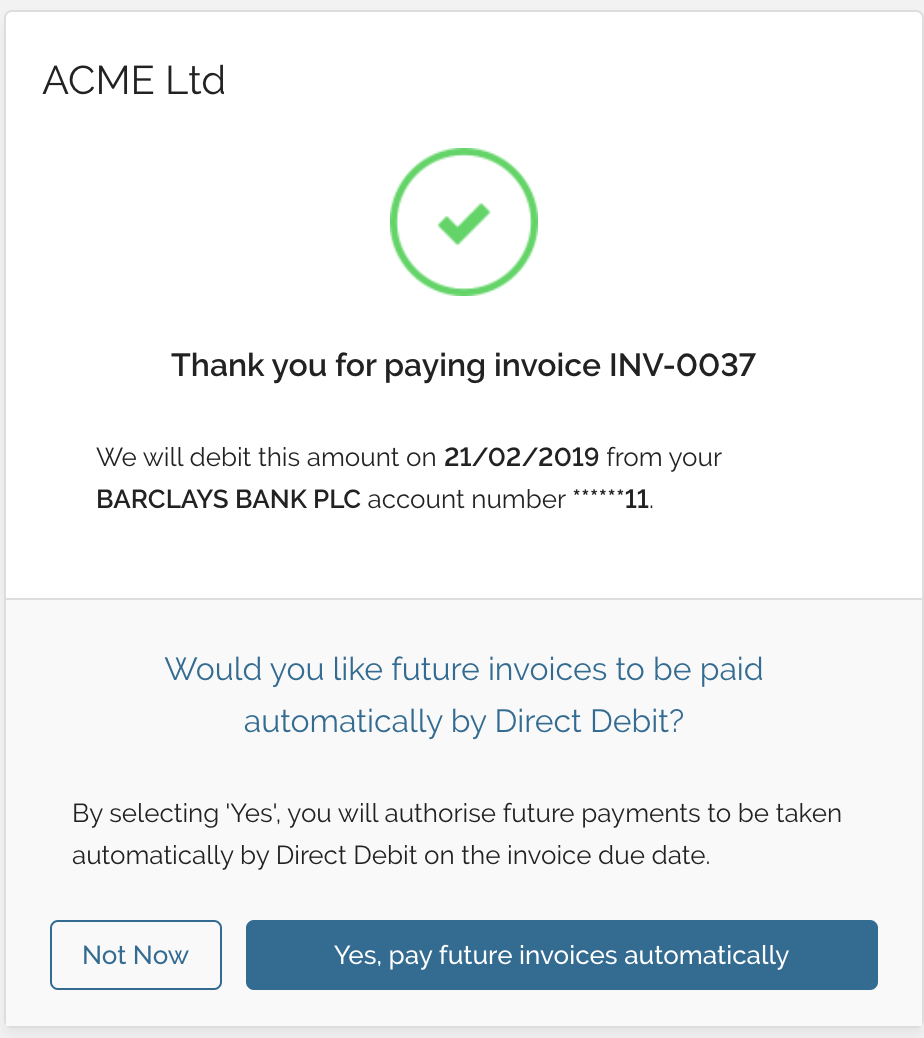
Please note: If the customer selects 'Not Now', this mandate will be restricted, and only the payment for that particular invoice will be automatically collected. All future payments will need customer's authorisation.
If the customer selects ' Yes, pay future invoices automatically' the mandate will not be restricted and future payments will be collected when scheduled.


