As part of the bulk change process to GoCardless, you'll need to use our bulk change import tool to upload details of your existing customers' Direct Debit Instructions (DDIs), also known as DD Authorities, into the GoCardless dashboard.
There are 10 steps you'll need to follow.
Step 1. Make sure you're using one of Chrome, Firefox, or IE 9+ as your internet browser
Step 2. Login to your GoCardless account via this link to open your Imports area
Alternatively, type 'manage.gocardless.com/imports' into your address bar and hit Enter

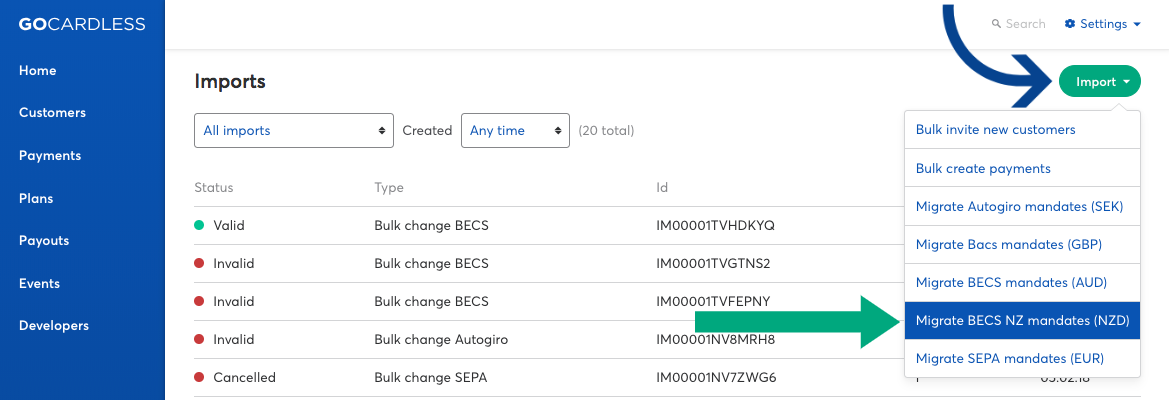
Step 3. Click the Import button in the top right and select Migrate BECS NZ mandates (NZD)
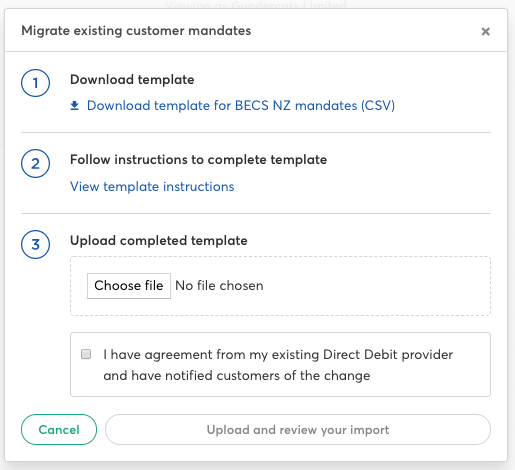
Step 4. In the window that opens, click Download template for BECS NZ mandates (CSV)
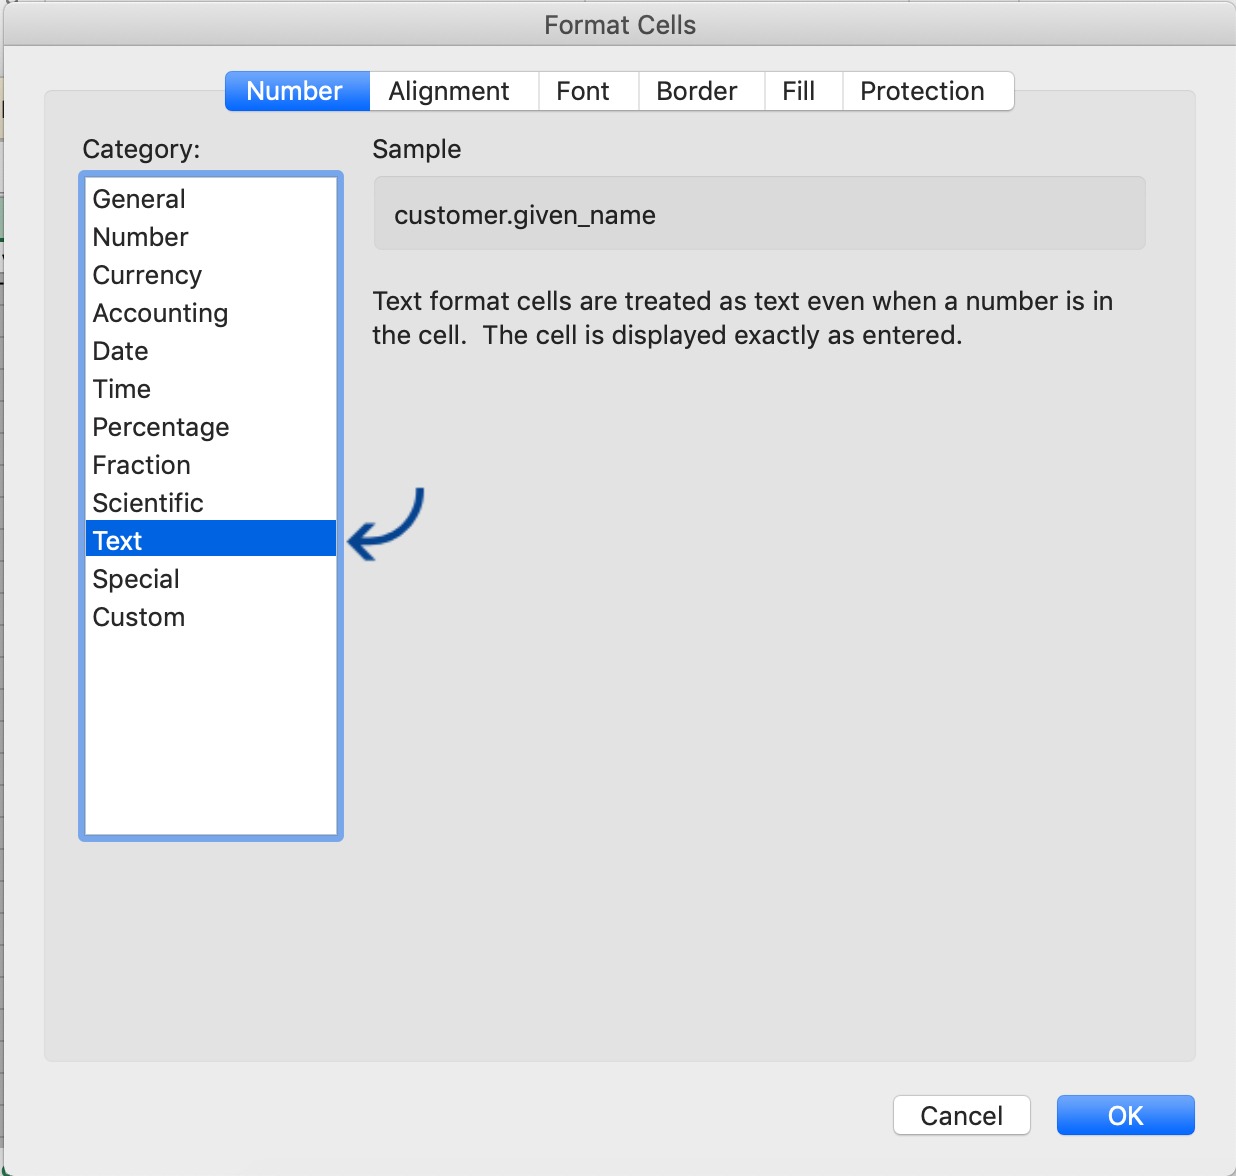
Step 5. Convert the CSV spreadsheet into 'Text' format within Excel. To do this:
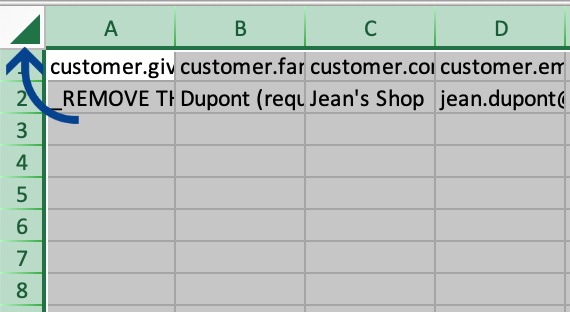
a). Click the arrow in the top left of the spreadsheet to select all cells
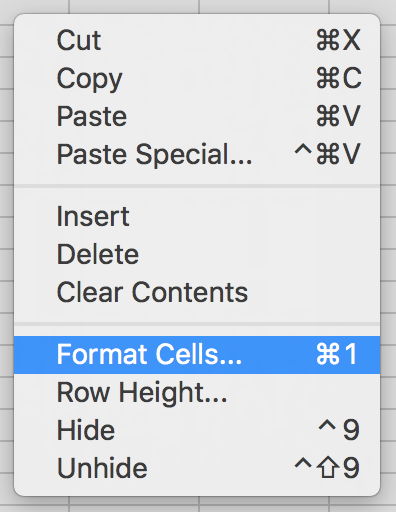
b). Right-click anywhere within the selected area and select Format Cells...
c). Select Text from the options in the left column and hit OK
Step 6. Add your customers' data to the CSV template, making sure to add it correctly
NOTE: You will need to delete the example data row in the CSV before uploading the template. You can do this by selecting the full row, right-clicking, and selecting 'delete'.
Step 7. Upload the template via step 3 in the Migrate existing customer mandates window
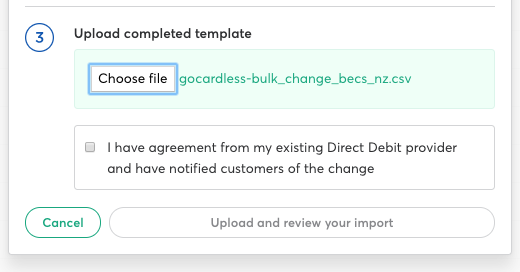
Step 8. Tick the box to confirm that you have agreed the bulk change with your existing Direct debit provider and have notified your customers of the change. Click Upload and review your import to proceed.

Step 9. Your CSV data will then run through a short validation process. If there are any errors, you will be advised as per the following notice.

You'll be shown details of the error(s) and where to find them below.
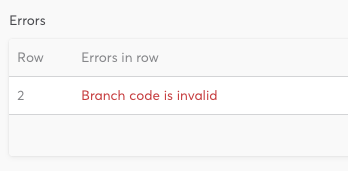
Once you have corrected the errors, save your CSV file and retry the upload.
Step 10. Let us know once you've completed the upload process, and we'll contact you with next steps.
How enter your customers' bulk change data
To avoid errors, make sure you complete the CSV template according to the requirements in the table below.
Some fields in the example row in the CSV include "(required)" after the information entered into that cell. This is just for example purposes but is used to identify the field as mandatory when entering customer information.
Data fields and examples:
| COLUMN | DATA | EXAMPLE |
|---|---|---|
| A | customer.given_name | Billy |
| B | customer.family_name | Jean |
| C | customer.company_name | James's Jeans |
| D | customer.email | billy.jean@example.com |
| E | customer.language | en |
| F | customer.phone_number | +64 4 817 9999 |
| G | customer.address_line1 | Flat 12 |
| H | customer.address_line2 | Half Moon Bay (suburb) |
| I | customer.city | Auckland |
| J | customer.postal_code | 2012 |
| K | customer.country_code | NZ |
| L | bank_account.account_holder_name | Billy Jean |
| M | bank_account.account_number | 1234567-00 |
| N | bank_account.branch_code | 0123 |
| O | bank_account.bank_code | 01 |
| P | customer.metadata.custom_reference | JAM12251 |
Please note: in column M (bank_account.account_number) a hyphen must be added between the account number and suffix, as outlined in the example above.